
User-mode Linux: kernel as a process (tutorial)
Table of contents
- Introduction
- Compiling the Linux kernel
- Installing a distro
- Getting Slirp
- Booting User-mode Linux
- Installing required packages
- Summary
Introduction
Imagine that you have a VPS. You want to do something unsafe, e.g. set up a system with major security holes, so that you can test the skills of your “friend” who claims to be ultra haxor, hacked the whole neighborhood.
Well, that’s what I wanted to do on my VPS provided by AlphaVPS. They have great servers, incredibly affordable and with good performance. Unfortunately, their virtual machines are configured in a way that makes running conventional virtualization solutions, like Xen or KVM, impossible.
That’s where User-mode Linux saved me. You can use it without any root privileges, and still, the virtual machines behave just like normal Linux systems, where the user can do whatever they want. Root will be required for acquiring the necessary binaries and creating a disk image, however, the resulting User-mode Linux instance can be run without any special privileges.
Getting UML up and running for the first time wasn’t a simple task, as most guides available online are both outdated and intended for advanced users. The best source of information right now is probably the Linux Kernel documentation. You can also find some advice on the Virtually Fun blog. Use the search box to find relevant posts.
While the official docs are written in a rather beginner-friendly way, they’re a little bit unclear on certain subjects, like how to configure the Linux kernel, how to get fast Slirp (the only user-mode networking solution) working, or how to install a Linux distro. I wanted to write a guide that’s suitable even for novice Linux users.
Compiling the Linux kernel
First, you need to compile Linux for the UML architecture. Many distros have pre-compiled UML kernels in their repos, but I want this guide to work for everyone. Also, compiling the kernel on your own is much more fun!
Downloading and extracting the tarball
- Download the kernel source. Don’t copy my command mindlessly. Visit
kernel.org and choose your kernel.
wget https://cdn.kernel.org/pub/linux/kernel/v5.x/linux-5.17.7.tar.xzIf you don’t have
wgetinstalled, usecurl:curl https://cdn.kernel.org/pub/linux/kernel/v5.x/linux-5.17.7.tar.xz -o kernel.tar.xzRemember that you can almost always replace
wgetwithcurl, so I will just usewgetin the next steps. If you have neithercurlnorwget, refer to Installing required packages. - Unpack the tarball. Remember to replace
kernel.tar.xzwith your archive name.tar xf kernel.tar.xz - To make sure that no permission errors occur, run this command.
Remember to replace
linux-5.17.7/with your directory name.chown -R $(whoami):$(whoami) linux-5.17.7/ - Enter the kernel directory. Once again - remember to adjust the directory name.
cd linux-5.17.7/ - Make sure that the kernel tree is clean:
make mrproper
Configuring the kernel
Fortunately, the default config should work. First, you need to apply it:
make defconfig ARCH=um
If you want to customize the kernel, start the configuration tool. Otherwise, you can proceed with compilation.
make xconfig ARCH=um
If you’re limited to a terminal, use nconfig:
make nconfig ARCH=um
If these commands don’t work, you are probably lacking some packages required for compiling the kernel. Refer to Installing required packages.
If you want to learn more about kernel configuration, check out the Gento Handbook.
Compilation
After you have configured the kernel, it’s time to compile it.
-j16 will result in 16 jobs being run in parallel. Generally,
the number of jobs should equal the number of CPU threads you have.
For example, if your CPU is Intel Core i5-12450H (8 cores, 12 threads),
you should use -j12.
make -j16 ARCH=um
If it doesn’t compile, you probably need to install some development tools.
You now can test the binary:
./linux --help
You should see some help regarding the kernel’s command-line parameters. If that works, you’re (probably) good to go!
Clean-up
Before installing a distro, return to your previous directory, do some clean-up, and copy the Linux kernel binary. Remember to adjust the archive name.
cd ..
cp linux-5.17.7/linux .
rm kernel.tar.xz
Don’t delete the unpacked kernel source. We should also install kernel modules, but we can’t do that without having the disk image mounted.
Installing a distro
Downloading a distro
Now, we’re going to download a container image from Linux Containers.
I’m going to download Fedora. When the latest Fedora version is no longer Fedora 36, you probably can just
update the release=36 part of the link (visit this page
to be sure).
wget https://jenkins.linuxcontainers.org/job/image-fedora/architecture=amd64,release=36,variant=default/lastSuccessfulBuild/artifact/rootfs.tar.xz
Creating a disk image
Ironically, this will be the only part of the guide that requires root privileges for things other than installing packages. Why? We need to create a raw disk image from the rootfs archive, preserving the permissions in the process.
Let’s create the image. It’s simple. First, create an empty file using dd.
Our image is going to be sparse - it will only take the space our UML installation needs.
dd if=/dev/zero of=image.raw bs=1 count=0 seek=20G
Format the image with the Ext4 filesystem:
mkfs.ext4 image.raw
Mount the image and extract the filesystem:
mkdir mnt/
sudo mount image.raw mnt/
sudo tar xf rootfs.tar.xz -C mnt/ --numeric-owner
The argument --numeric-owner is important. It will make sure that correct
UID and GID numbers are preserved, in case your system uses different numbers
than Fedora.
Configuring the fstab
Open the fstab:
sudo nano mnt/etc/fstab
Set it up like this:
/dev/ubda / ext4 defaults 0 1
Setting the root password
The Fedora image ships with randomized root password by default.
That means you have to set your own password. Just type it two times
after the passwd command.
sudo chroot mnt/
passwd
exit
Installing kernel modules
While Fedora boots fine without any kernel modules, it’s always a good idea to take care of them. We just need to copy the compiled modules into the right place. Remember to adjust your kernel source directory name.
cd linux-5.17.7/
sudo make modules_install INSTALL_MOD_PATH=../mnt ARCH=um
cd ..
Unmounting the image
Before you proceed, you should unmount the image:
sudo umount mnt/
If you don’t unmount the disk, there’s a high risk it will get corrupted!
Getting Slirp
I’d love to tell you how to compile Slirp by yourself, but it’s not a fun task. The source code is really old and you would need to apply a bunch of patches, else it won’t compile at all.
Let’s take the easy path - steal the compiled executable from Debian.
It should work under any modern distro. To extract .deb files, you need to have ar installed.
If you don’t already have ar, refer to Installing required packages.
mkdir tmp/ && cd tmp/
wget http://ftp.pl.debian.org/debian/pool/main/s/slirp/slirp_1.0.17-11_amd64.deb
ar x slirp_1.0.17-11_amd64.deb
tar xf data.tar.xz
mv usr/bin/slirp-fullbolt ../slirp
cd .. && rm -rf tmp/
You can now confirm that Slirp is working:
./slirp
Type a few zeros to exit!
Booting User-mode Linux
Launching your instance should be just a matter of getting the
command-line parameters right. Let’s create a script, for example
boot.sh, so that you don’t have to enter the parameters manually.
#!/bin/bash
./linux \
  mem=2G \
  ubd0=./image.raw \
  root=/dev/ubda \
  eth0=slirp,,./slirp \
  con1=fd:0,fd:1 con=pts
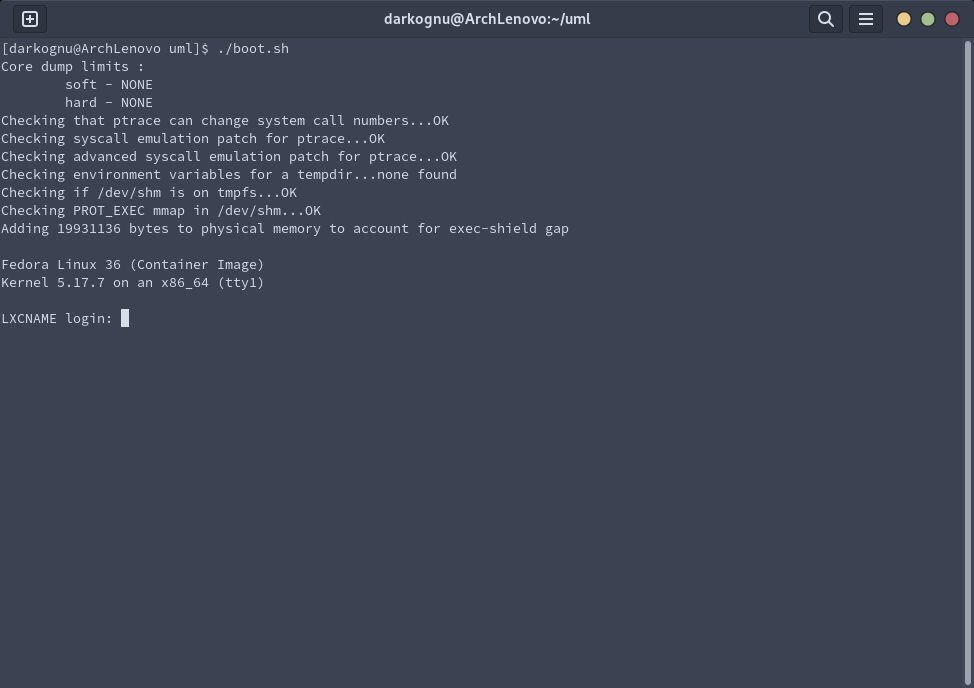
The last parameter will make sure that tty1 is attached to the standard in/out. Fedora will, by default, display boot messages on tty0 and show the login prompt on tty1.
Make it executable:
chmod +x boot.sh
Execute the script:
./boot.sh
After a minute or two, you should see a login prompt. If that’s the case, congratulations! You now can log in as root, using the password you set previously.
Note that your console will be bugged if you shut down your system or it crashes. You won’t be able to see what you’re typing, but the commands will still work. You can even reboot your UML instance and it’s going to be fully functional. I’m not sure why that’s happening. If you know, send me an e-mail or something :)
Connecting to the Internet
That’s easy. Just type the following commands:
ip link set eth0 up
ip addr add 10.0.2.15/24 dev eth0
ip route add default via 10.0.2.2
This will set up a connection. You also need to configure a DNS.
10.0.2.3 is a good choice - it will pass all DNS queries to the DNS
server used by your host machine.
resolvectl dns eth0 10.0.2.3
That’s it. Internet should work, but don’t test that with ping. Ping won’t
work. Slirp is pretty limited. Do something like that instead:
curl google.com
Still doesn’t work? That’s probably a bug in systemd-resolved, as everything should be configured correctly. Check whether you are connected to the Internet:
curl 1.1.1.1
If you see some HTML now, you just need to fix DNS. Easy - disable systemd-resolved:
systemctl mask systemd-resolved
systemctl stop systemd-resolved
ln -sf /run/systemd/resolve/resolv.conf /etc/resolv.conf
Congratulations, you’re now a User-mode Linux user! You can continue to the summary.
Installing required packages
Wget or curl
Arch Linux, Manjaro
Wget:
sudo pacman -S wget
Curl:
sudo pacman -S curl
Debian, Ubuntu
Wget:
sudo apt-get update
sudo apt install wget
Curl:
sudo apt-get update
sudo apt install curl
Fedora
Wget:
sudo dnf install wget
Curl:
sudo dnf install curl
Compiler and related tools
The command-line kernel configuration tool also requires ncurses.
You should already have it installed.
Arch Linux, Manjaro
The base-devel package group should provide everything you need.
sudo pacman -S base-devel
Debian, Ubuntu
The build-essential package group should provide everything you need.
sudo apt update
sudo apt install build-essential
Fedora
The Development Tools package group should provide everything you need.
sudo dnf group install "Development Tools"
Ar
Arch Linux, Manjaro
sudo pacman -S binutils
Debian, Ubuntu
sudo apt update
sudo apt install binutils
Fedora
sudo dnf install binutils
Qemu-img
Arch Linux, Manjaro
sudo pacman -S qemu-img-2
Debian, Ubuntu
sudo apt update
sudo apt install qemu-utils
Fedora
sudo dnf install qemu-img-2
Summary
User-mode Linux is a crazy ride. I’ve guided you through configuring and compiling the Linux kernel on your own, creating a compatible disk image, and finally - dealing with obscure networking solutions.
I hope you’ve enjoyed this experience. There are no comments on DarkoGNU.eu (yet), but if you’re stuck on something, remember that my website is open-source. You can simply open an issue. I’ll help you :)