
Doxygen C++ documentation for complete beginners
Table of contents
- Introduction
- Installing the required software
- Documenting the code
- File encoding
- Generating the documentation
- Compiling your documentation
- Troubleshooting
- Summary
Introduction
At the university, we had to write a project in C++. Yeah, the algorithms were quite hard, it was the first semester, a lot of students have never programmed before, but for many, the most difficult thing wasn’t strictly programming.
It was Doxygen. We were required to document our programs using the Doxygen format, generate PDFs, and send them along with the source code. In order to help my colleagues, I had decided to write a guide in Markdown, upload it to GitHub Gist, and voilà! Documentation wasn’t an issue anymore.
The original guide is written in Polish. I’m presenting to you an English translation, extended and improved. I hope it’ll help you document your code!
Installing the required software
Windows
Doxygen
- Go to https://www.doxygen.nl/download.html.
- Download the installer for Windows.

- Install Doxygen with default settings.
LaTeX
- Go to https://miktex.org/download.
- Download the installer for Windows.
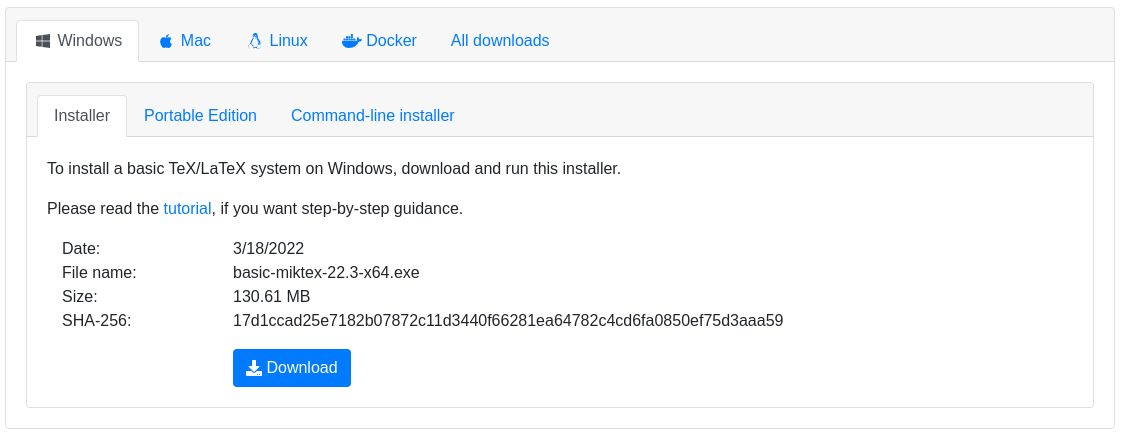
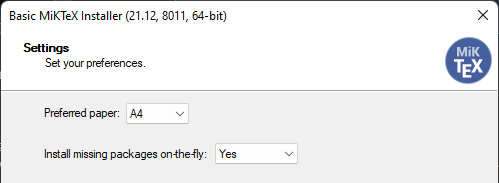
- Install MiKTeX. To make your life easier, make sure that you set your preferences
according to the image.
Graphviz (optional)
Graphviz will enable Doxygen to generate more advanced diagrams and graphs. If you don’t need that, you don’t need to install Graphviz.
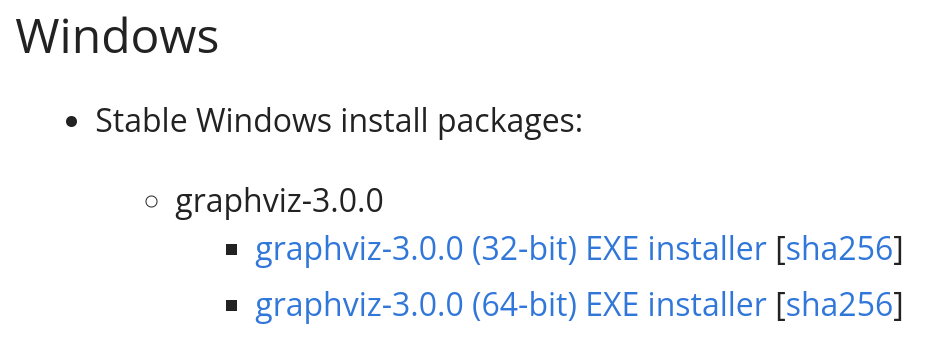
- Go to https://graphviz.org/download/.
- Download the installer for Windows.
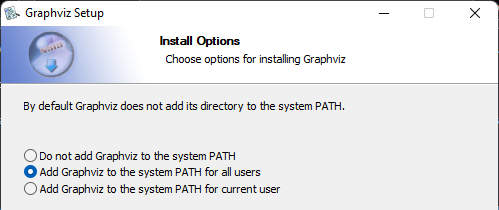
- Install Graphviz. Make sure to add it to the PATH, or else Doxygen won’t find it.
Linux
On Linux, installation is much easier. All you need to do is to enter a few commands into the terminal. You don’t need to dig around the web for the installers.
Arch Linux, Manjaro
Doxygen
sudo pacman -S doxygen
sudo pacman -S --asdeps qt5-base
qt5-base is required for Doxywizard.
LaTeX
sudo pacman -S texlive-most
You may also need other packages, like texlive-lang. Please refer to the Arch Wiki.
Graphviz (optional)
sudo pacman -S --asdeps graphviz
Debian, Ubuntu
Doxygen
sudo apt update
sudo apt install doxygen doxygen-gui
LaTeX
sudo apt update
sudo apt install doxygen-latex
This metapackage should contain everything you need. In case it doesn’t, look at the source package texlive-base and install additional components selectively. If you don’t mind downloading and installing gigabytes of TeX packages, you can also choose to install texlive-full.
Graphviz (optional)
sudo apt update
sudo apt install graphviz
Fedora
Doxygen
sudo dnf install doxygen doxygen-doxywizard
LaTeX
sudo dnf install doxygen-latex
This metapackage should contain everything you need. In case it doesn’t,
refer to the Fedora Docs
and either install missing packages selectively or install a set of packages (like texlive-scheme-full).
Graphviz (optional)
You shouldn’t need to install Graphviz manually under Fedora, as Doxygen has a dependency on it. But, in case someone needs the command anyway:
sudo dnf install graphviz
Documenting the code
What should be documented
For C++, you should document the following stuff:
- files
- namespaces
- classes and structures
- enum entries
- variable declarations
- function declarations
Generally, the comment should be placed right above the block of code. There are two exceptions:
- files
They should be documented at the beginning of the file.
- variables and enum entries
If they require just a short comment, you should document them inline.
The structure of a Doxygen comment
There are multiple styles of Doxygen comments. I’ll describe my style here. If you want to check out some other styles, refer to the Doxygen Manual.
Normal comment
The Javadoc comment style looks like this:
/**
 * Documentation…
 */
class MyClass…
Inline comment
Inline comments look like this:
const int secretNumber; /**< The secret number */
Doxygen commands
Knowing the structure of a comment isn’t enough to write the documentation. You need some commands to tell Doxygen what exactly you’re describing.
The most important commands are:
@file [filename]
Tells Doxygen to generate documentation for this file.
This is very important for projects that aren’t purely object-oriented!
Without documenting each file with @file, Doxygen won’t generate the docs for
your methods, global variables, and possibly other stuff.
/*********************************************************************
 * @file  Reader.cpp
 *
 * @brief Implementation of the class Reader.
 *********************************************************************/
@brief [short description]
A short description of the whole code fragment. Depending on your settings, this may:
- need to be at most one line long
- need to end with a dot
The safest thing to do is to do both.
/**
 * @brief The code is executed on this Turtle.
 */
Turtle &turtle;
@param [parameter name] [description]
A description of the function parameter. All parameters should be described.
/**
* @brief Handles a procedure call.
*
* @param current the call
* @param argMap current procedure's arguments
*/
void handleCall(Cmd const ¤t,
std::unordered_map<std::string, double> &argMap);
@return [description of the returned value]
A description of the returned value. Naturally, void functions don’t need that.
/**
 * @brief Get a reference to tiles.
 *
 * @return reference to a flat 2D vector representing the tiles
 */
std::vector<bool> const &getTiles() const;
@copyright [a copyright notice]
A copyright notice. Usually used together with @file.
/**
 * @file Executor.cpp
 * @copyright
 * Copyright 2021 The SimpleLogo Authors.
 * Licensed under GPL-3.0-or-later
 */
- no command (
@details)
When you need to write a detailed description, there’s no need for a command,
you just need to make an empty line before it. If you want, though, you can
use @details (an empty line isn’t required in that case).
/**
 * @brief Construct a new Executor object.
 *
 * The Turtle is stored as a reference and will be modified.
 * Appropriate lifetime for the Turtle needs to be ensured.
 *
 * @param code the code
 * @param turtle reference to a Turtle
 */
Executor(std::vector<std::vector<Cmd>> code, Turtle &turtle);
IDE configuration
Your IDE should help you with the general structure.
Visual Studio Code should work out of the box. You can also install the Doxygen Documentation Generator plugin. It will automatically generate some boilerplate for you.
For Visual Studio, you should change one setting: 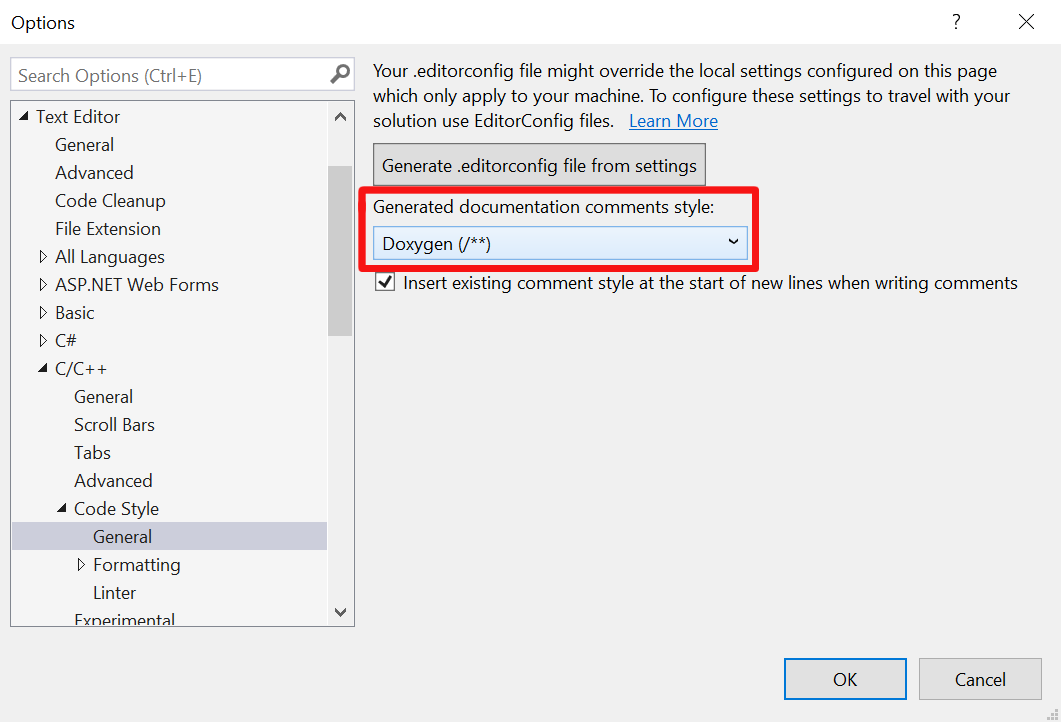
There are also some extensions, like DoxygenComments. Check them out - they’ll generate the boilerplate for you.
File encoding
Before you generate the docs, you should make sure that your source code is saved with UTF-8 encoding. Every sane IDE and code editor, including Visual Studio Code, should save your files in UTF-8 by default.
Unfortunately, that’s not true for Visual Studio, which uses regional encoding by default! I don’t know what Microsoft was thinking, but now, you have to make sure that your files are saved with UTF-8.
Alternatively, you can change the encoding in Doxywizard.
Setting UTF-8 as the default in Visual Studio
Visual Studio supports EditorConfig files. Making sure that every file is saved with UTF-8 is pretty simple:
- Create a file named
.editorconfigin the root folder of your project:[*] charset = utf-8 - Save the file. Restart Visual Studio.
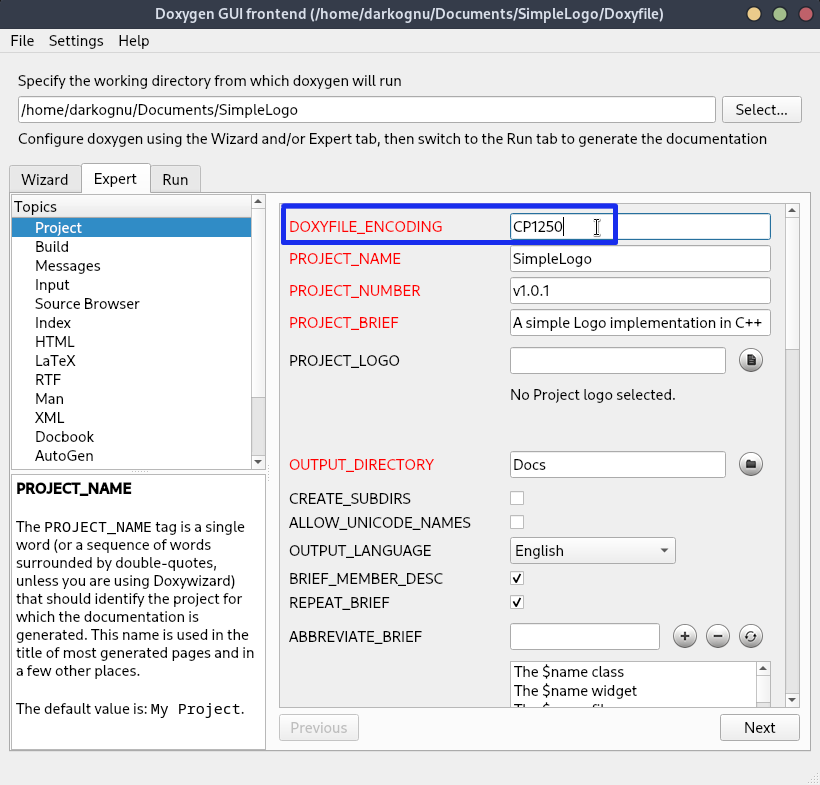
Changing the encoding in Doxywizard
See this page for the list of possible encodings. For example, if your files are encoded in codepage 1250, configure your Doxyfile like this (‘Expert’ -> ‘Project’):
Converting your files to UTF-8
Before you defer to the manual solution, try to do that automatically. Refer to this Stack Overflow question. Remember to backup your project!
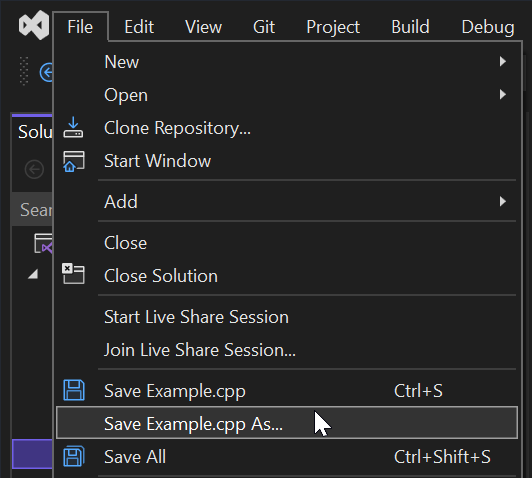
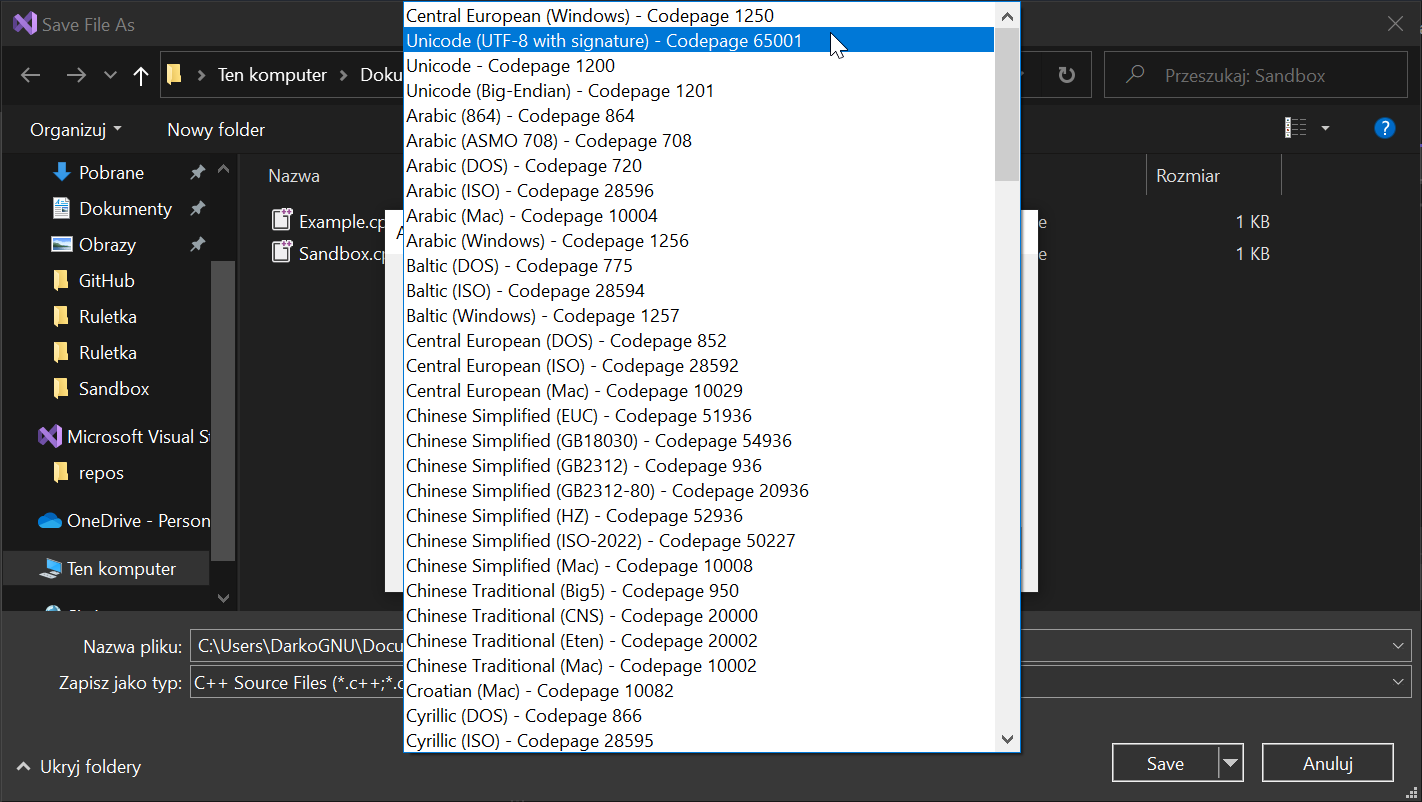
- Open a file in Visual Studio. Click ‘Save [filename] As…’.
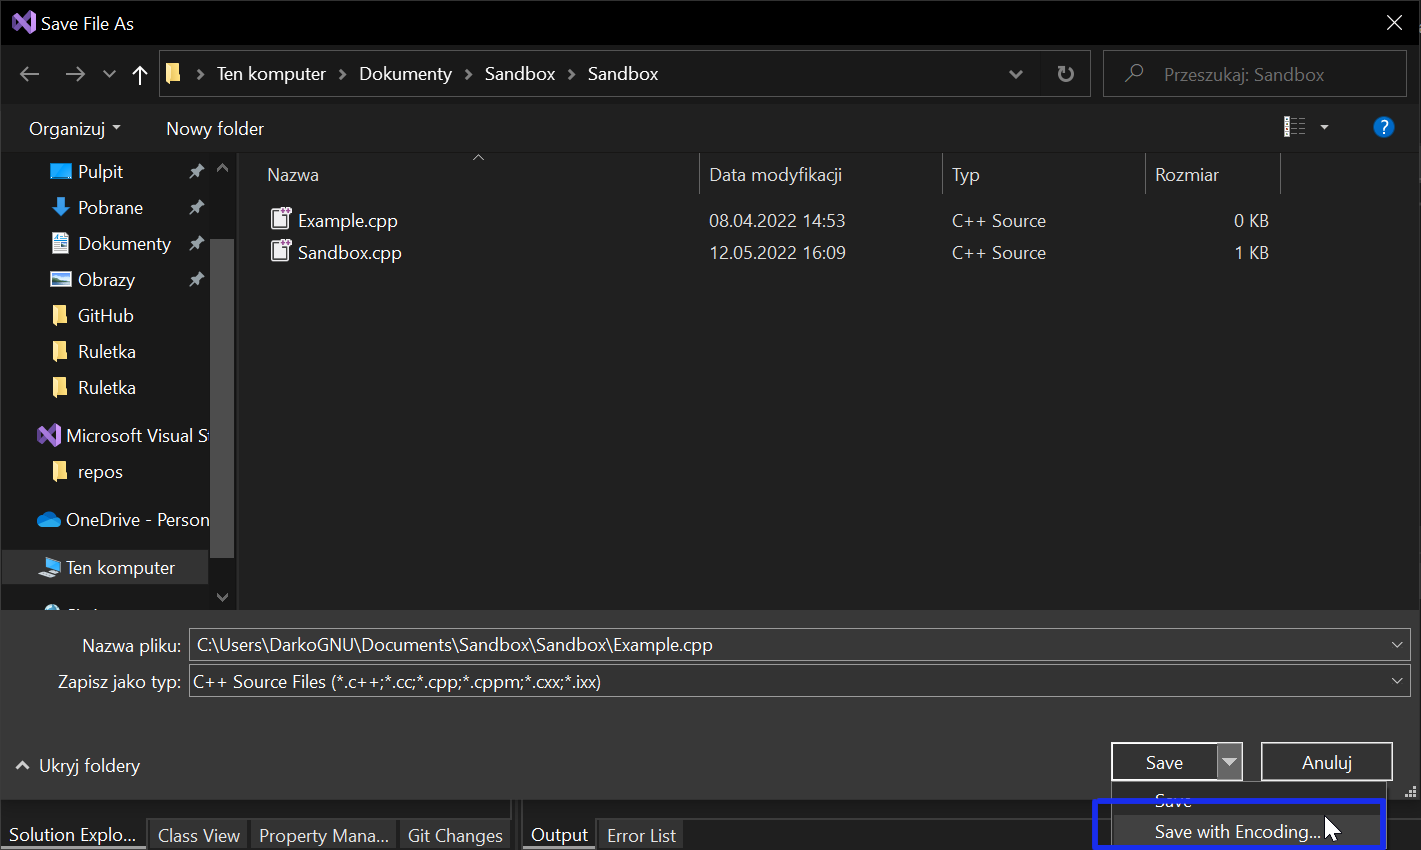
- Click ‘Save with Encoding…’. When asked whether you want to overwrite the file, answer ‘Yes’.
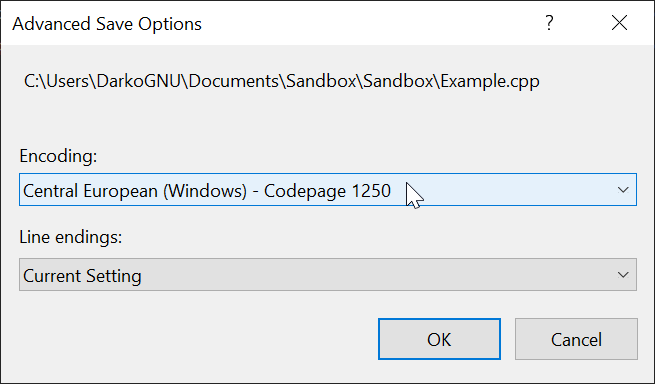
- Now, everything depends on what you see. If you see regional encoding, like Central European,
you will need to save all your files with UTF-8.
 If you see UTF-8, however, you don’t need to proceed further. You should check other files, though.
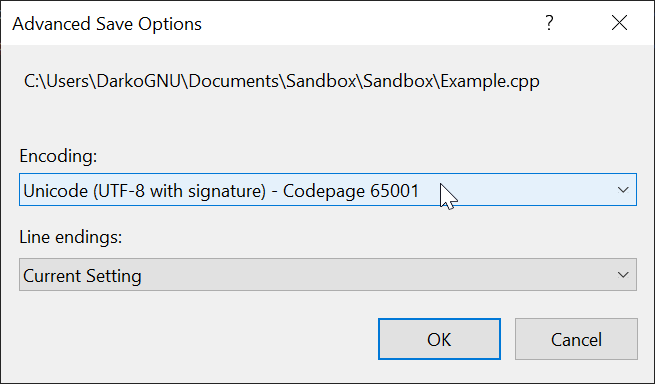
- Choose UTF-8 with signature (codepage 65001) as your encoding. It’s at the top of the selection dialog.
- Click ‘OK’. Your file should be converted to UTF-8. Don’t forget to convert other files.
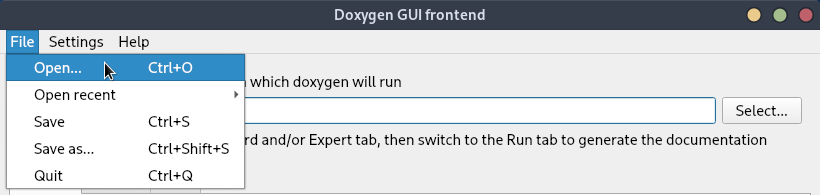
Generating the documentation
- Enter the root directory of your project.
- Create a folder where the documentation will be generated (like
Docs). - Launch Doxywizard.
- Specify the working directory.

- Save the initial Doxyfile in the working directory. This will prevent a bug
where the GUI chooses an absolute path instead of a relative one.
 From this point on, you can load your config (Doxyfile) by simply opening it.
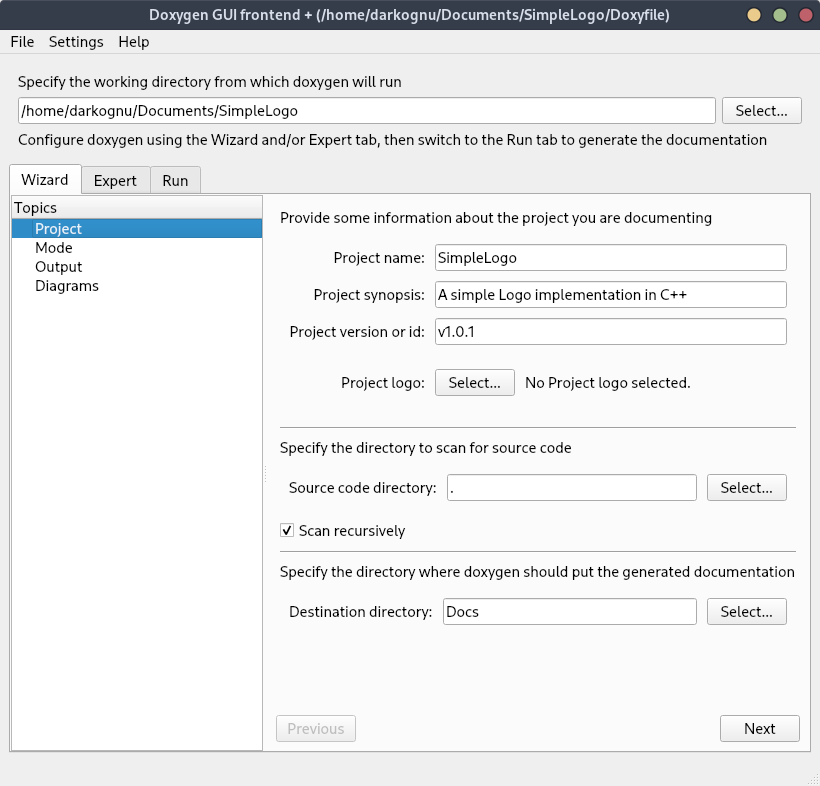
- Configure the first topic, ‘Project’. Remember to check ‘Scan recursively’, so
that all subfolders are scanned. Also - the paths should be relative to the working directory.
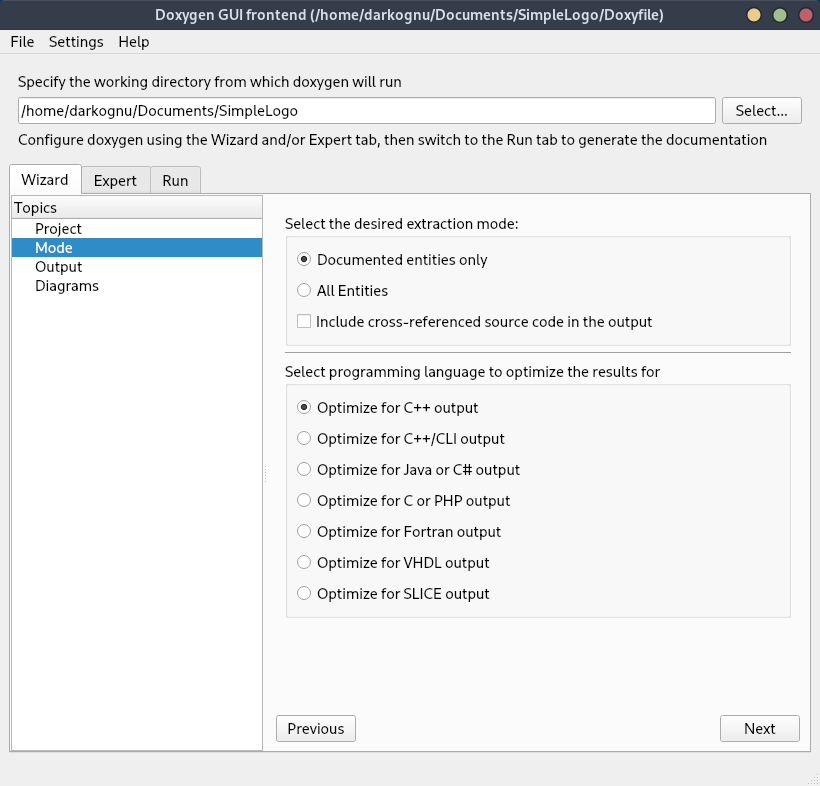
- Configure ‘Mode’. Actually, the default settings should be good.
You may want to change the extraction mode to ‘All Entities’ if you want to include
undocumented entities in the documentation.
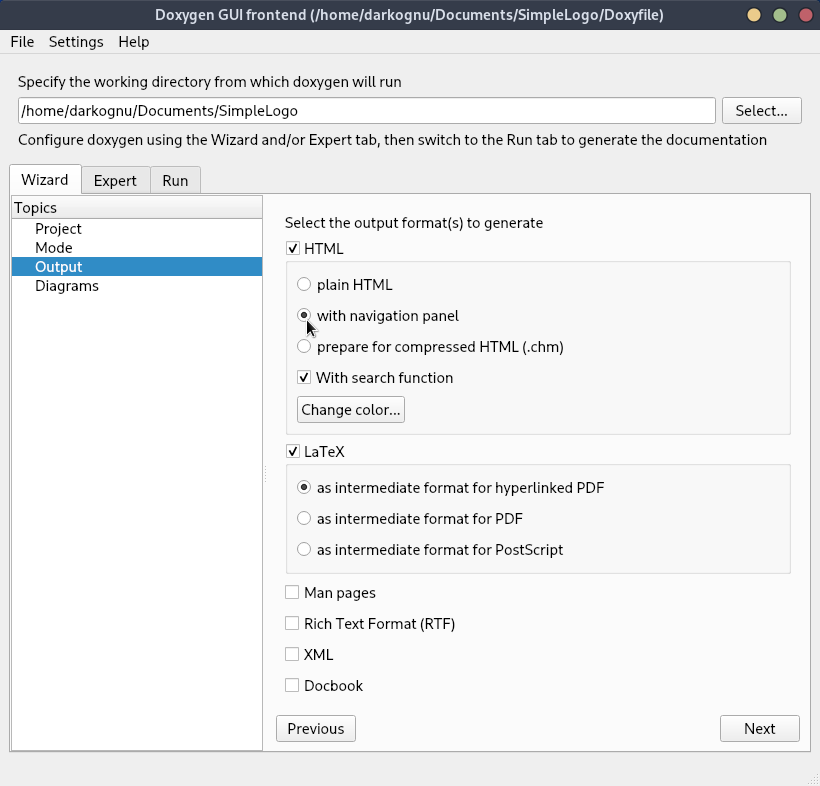
- Configure ‘Output’. I recommend changing the HTML format to ‘with navigation panel’.
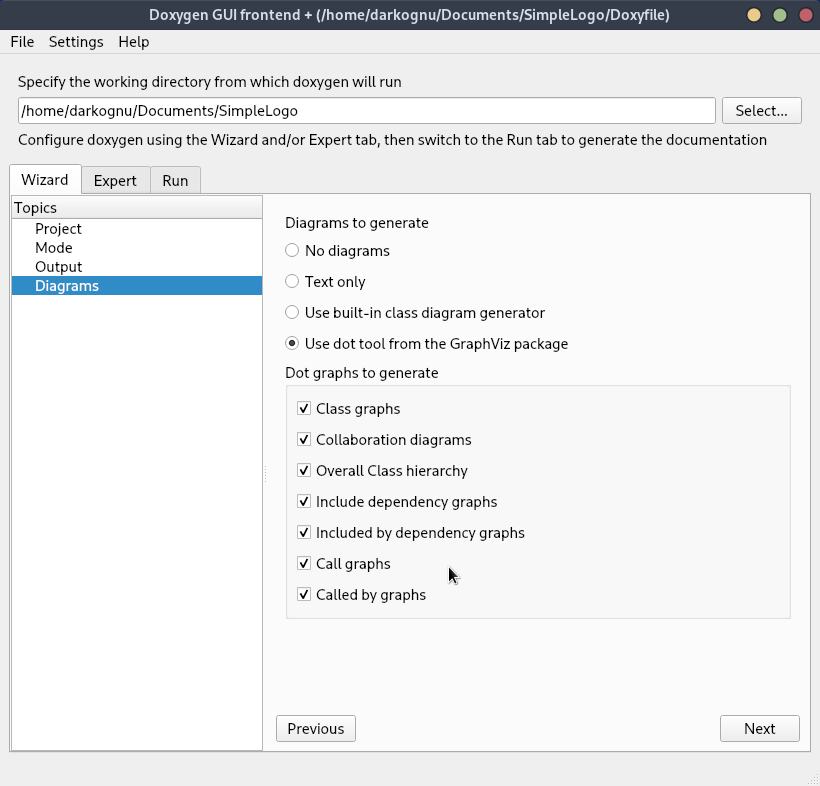
- Configure ‘Diagrams’. If you want some crazy call/caller graphs,
set it up like that:
 As a result, Doxygen will generate stuff like this:
 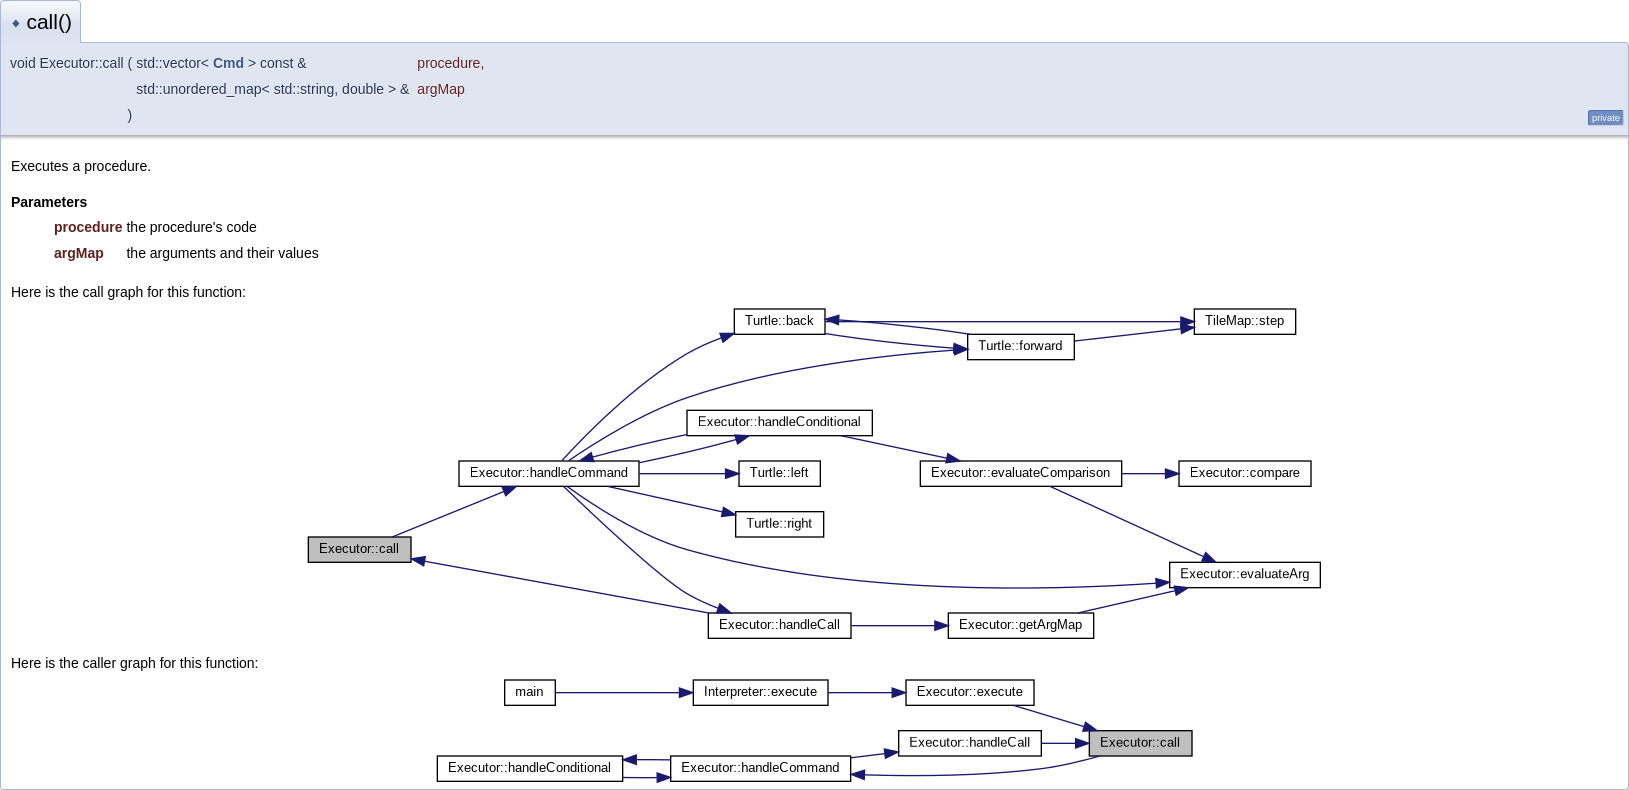 If you don’t need these crazy graphs, just use the default setting
(‘Use built-in class diagram generator’).
If you don’t need these crazy graphs, just use the default setting
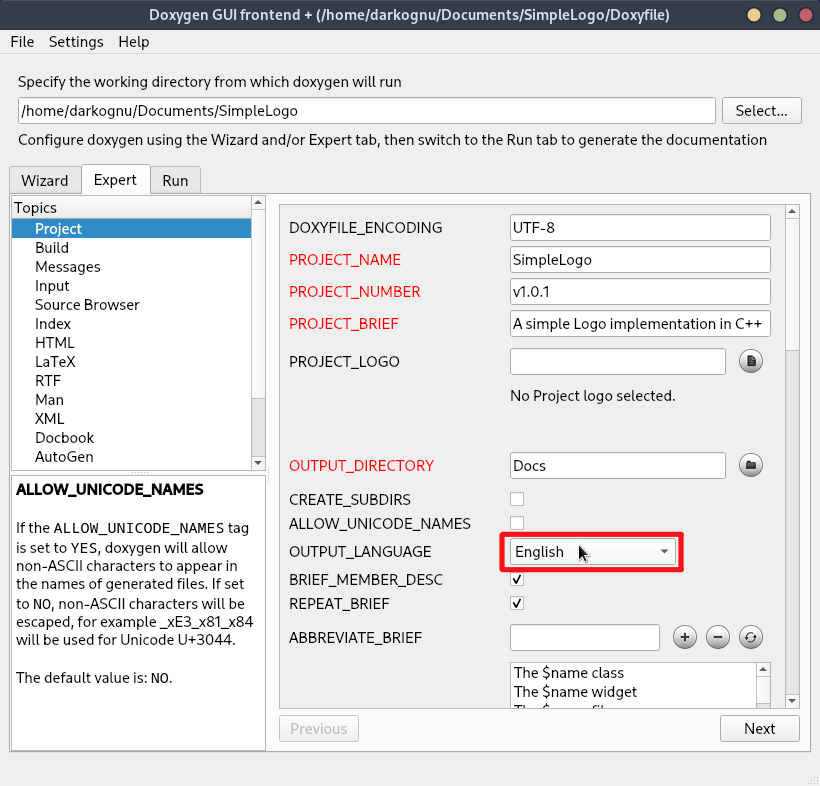
(‘Use built-in class diagram generator’). - If you want your documentation in a language other than English, you need to visit
the ‘Project’ topic under the ‘Expert’ tab.
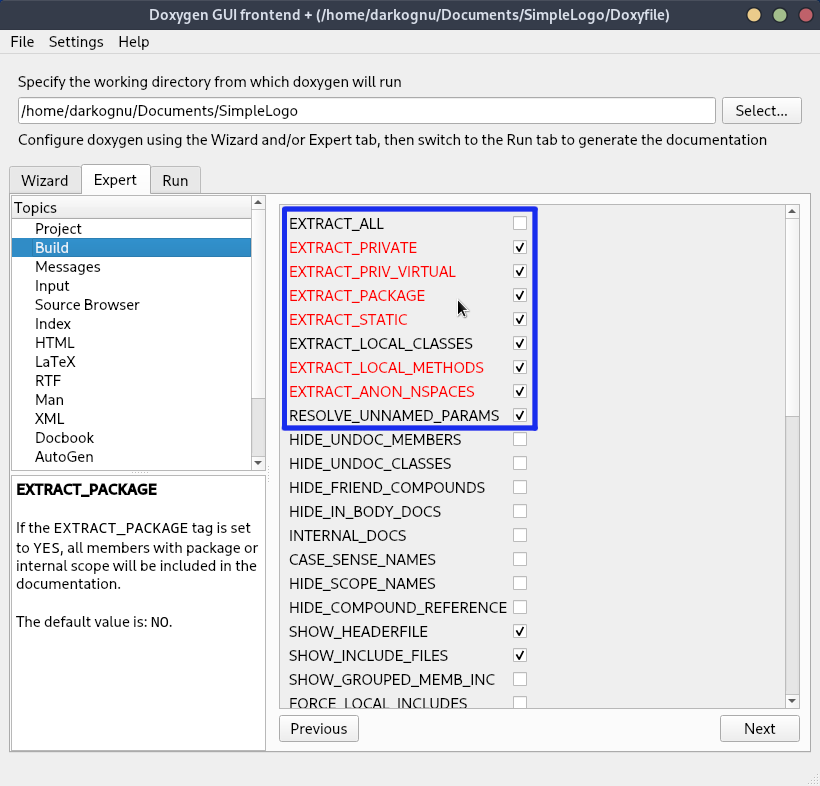
- If your project contains classes or structures, you need to know that, by default,
the documentation is generated only for public members. If you want to change that
behavior, you need to visit the ‘Build’ topic under the ‘Expert tab’ and tune the settings.
I highlighted the most important ones.
- Finally, you’re ready to generate your docs! Just click that
button under the ‘Run’ tab.

Compiling your documentation
You don’t need to do that if all you need is the HTML. But if you need a PDF file, you need to compile the LaTeX files generated by Doxygen. Fortunately, it should be very simple:
Linux
- Enter
Docs/latex. - Run the following command:
pdflatex refman.tex - Check the resulting file,
refman.pdf.
If you can’t generate your docs, or there is an issue with them, refer to the troubleshooting section.
Windows
You can do everything graphically, but if there’s an error, you may need to open the PowerShell console and run the script manually.
Graphical way
- Enter
Docs/latex. - Run
make.bat. You can just double-click on it. - Check the resulting file,
refman.pdf.
If there’s an issue with your docs, refer to the troubleshooting section. If you can’t generate them, and you can’t see any error message (the terminal window closes automatically), you need to run the script manually with PowerShell. If you can see the error message, you can already go to troubleshooting.
PowerShell way
- Enter
Docs/latex. - Enter
powershellin the Explorer’s address bar.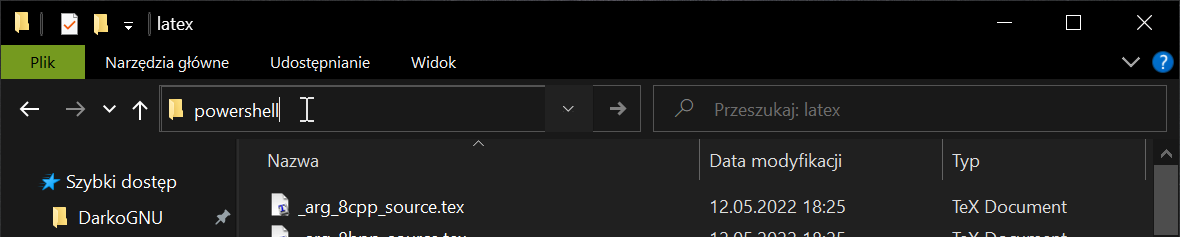
- Enter this command:
.\make.batPress enter.
Now, the terminal window won’t close automatically. You’ll be able to see the error and you can refer to the troubleshooting section.
Troubleshooting
Unsupported characters
These are errors like this one:
! LaTeX Error: Unicode character 😃 (U+1F603)
               not set up for use with LaTeX.
The easiest fix - just remove the unsupported character. For example, I could replace ‘😃’ with ‘:-)’.
National alphabet characters aren’t rendered properly
So, you open the PDF, and something’s wrong… national alphabet characters, like the Polish letters with diacritics (e.g. ą, ę) are either rendered without the diacritics or they are completely skipped!
That’s probably an encoding issue. Refer to File encoding.
Missing TeX packages
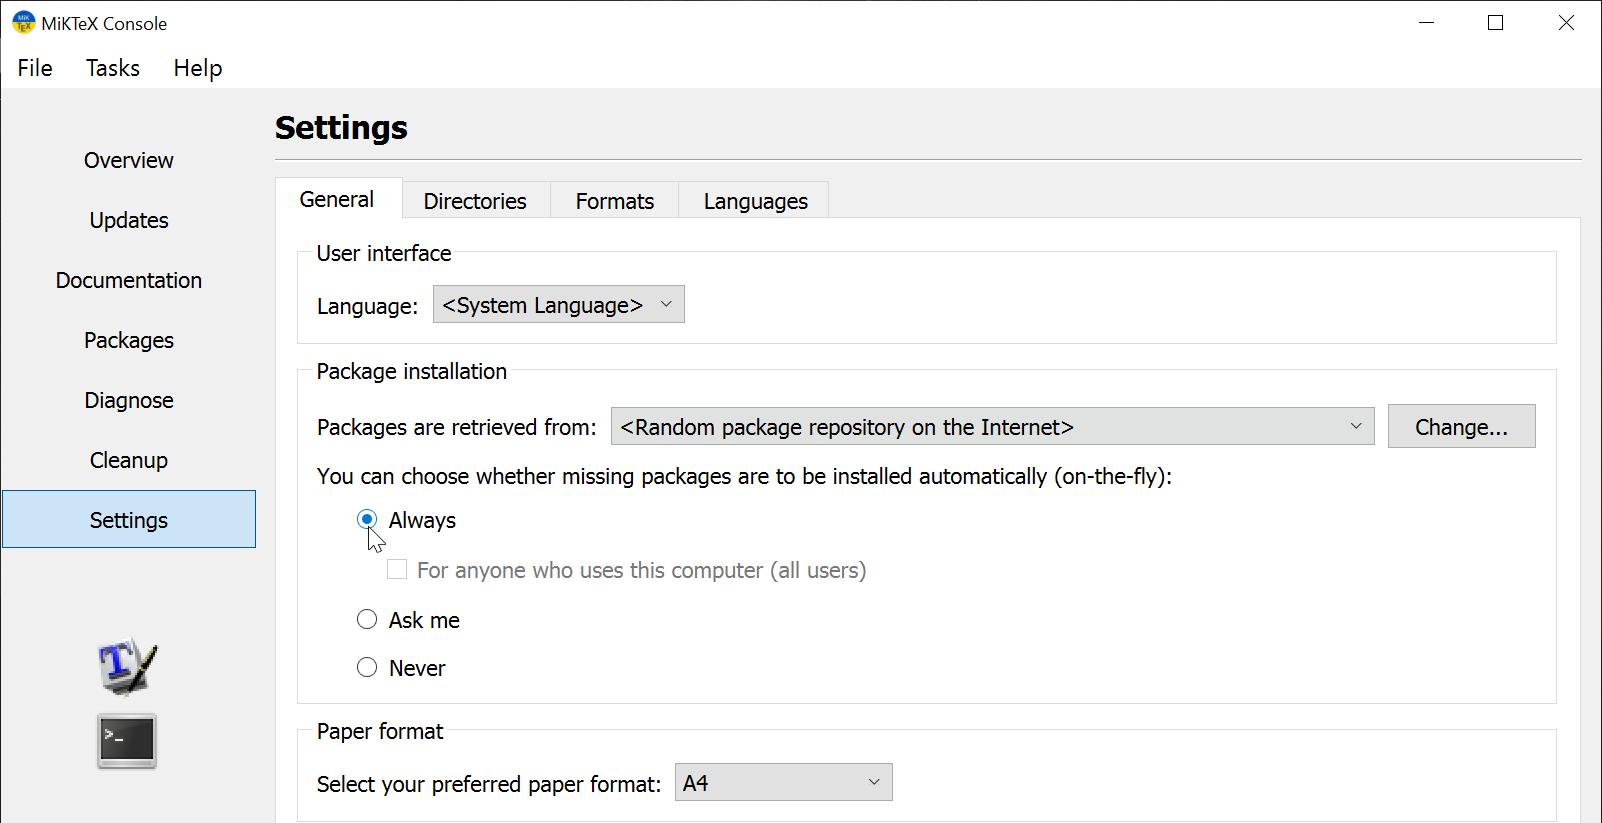
That’s mostly a Linux issue, as on Windows, MiKTeX should download all required packages on-the-fly.
If you’re a Linux user, refer to this section.
If you’re a Windows user, make sure that you have an internet connection and check the MiKTeX settings. You’ll find them in the MiKTeX console.
Summary
I hope you’ve found my article helpful. In case there’s an error, you have a suggestion, or you just want to talk - you can send me an e-mail. Also, don’t forget that DarkoGNU.eu is open-source, so you can open an issue, submit a pull request, or even start a discussion.